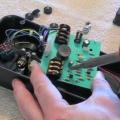
 The fine folks at Core One Product sent over a Bullet Cable Slug Connector Kit for me to try out, and I’m very glad they did! Usually, when musicians first start exploring pedals, it starts with a few pedals on the floor. The natural direction is to get some cheaper patch cables and start linking them up. Eventually, the tear down and set up times of setting up pedals gets annoying, so a pedal board of some type enters the picture – usually something home made or something a little bigger a pro. At this point certain decisions are made for how to patch these pedals. While pedals grow, it’s important to have something that can pass a descent signal AND not fail.
When we start talking about patch cables, we can easily break this down into two types. Solderless cables and soldered cables. Basically, soldered cables are sized to a specific length with a variety of plugs and the cables are soldered to the plugs. Solderless cables allow you to cut your own lengths of cable and attach plugs without the need of a soldering iron and soldering skills. Definitely, solderless kits will give you the most flexibility in regards of length options and is a very popular option for shoe gazers.
Today, I wanted to talk about the Bullet Cable Slug Connector Kit. Doing some research on this product, I continually saw videos showing how fast and easy these are to assemble, but I wanted to go into more of the specifics of how to assemble the slug connector kit. I do have to say… these are really incredibly fast and easy though (you’ll see later).
Let’s first stop and understand how a cable works. A cable is comprised of two separate pieces – the signal wire and the shielding wire. The signal wire is a small collection of copper wire in the center of the cable. This actually sends the signal of your instrument to the amp or pedal. This is protected by a layer of copper weaving called the shield. The shield is weaved throughout the length of the wire and that is there to protect signal interference, hum, etc. from the signal wire. The shield is connected to the ‘ground’ of the pedal, amp and guitar. If the shield or ground touches the signal wire in any way, your signal will die instantly, so there is a separation between the signal and shield that needs to be maintained.
The plugs provide a junction for the shield and signal to the instrument or the amp. Plugs have a ‘tip’ and ‘sleeve’. The black piece of plastic near the tip of the plug is what separates the two (remember, signal touches ground/shield, it’s all over for the sound). The tip touches the ‘tip’ of the jack, and the shield will touch the shield or ‘ring’ of the jack, and the circuit is transferred to the pedal or the amp.
Normally, to solder cables, you would need to connect and solder the shield to the sleeve connection of the plug, and then you would need to connect the signal wire to the tip of the plug. Solderless cables use the exact same principal, but provide a easy way to do this without soldering, and I’ll discuss the steps here.
1. The Slug Connector Kit comes with 10 feet of cable. So the first step is to cut a portion to fit the gap you need. Try to make a clean cut when you do. Avoid pinching the cable when cutting. I used a utility knife and that worked great. I then inspect the end. In the image below, you can see the outer shield wire and the signal wire, make sure you check to ensure that the shield wires are not accidentally touching or is close to the signal wire.

2. Next, grab your 2mm Hex Key and grab two slug connectors (one for each end of your cable). You’ll notice at the base of the connector there is a hex screw. This is for making the ground/shield connection and to secure the plug to the cable.

Loosen screw while looking into the hole where you would feed the cable.

Loosen the screw until you see the screw retract to be flush with the housing (you don’t need to completely remove the screw). This slug connector has two important pieces. The screw, which will connect or shield and at the very top of the hole, you’ll see a spike that is conical, which will connect the signal to the tip of the plug.

3. Push the cable into the slug connector. You’ll want to push in the cable with some pressure. The cable will make contact with the needle and create the connection with the signal wire.

4. Next you’ll want to tighten the hex screw. The screw will pierce the outer housing of the cable and make contact with the shield. A very important note! Do NOT over tighten the screw. It’s not about making the cable snug in the plug. When you over tighten, the screw it will make contact with the shield… and continue through to the signal wire. Remember, when shield touches signal.. you have a dead cable.
If you do over tighten, simply loosen the screw and remove the plug, and re-trim the cable before the hole that was created when screwing in the hex screw. Below is a photo of the plug removed so you can see what the hole looks like at the end of the cable.

The slug connector kit comes with 10 connectors allowing you to create 5 individual patch cables. I tested the signal quality with my set, and the signal quality is excellent and I would recommend this kit for anyone looking to tighten up their boards or replace noisy or failing patch cables. I would definitely recommend all solderless kits with pedals mounted on a board vs. loose pedals on the floor. In my experience with ALL solderless systems, things can loosen up if moved all the time, which could lead to problems. When these cables are connecting to mounted pedals, it’s extremely solid. If you plan on having loose pedals on the floor, I would probably recommend soldered cables.
The Bullet Cable – Slug Connector Kit can be purchased directly from CoreOne or from Amazon for $79.95. Also, be sure to check out BulletCable.com for more information about their other products. They’re definitely a great company with great products!
As I mentioned earlier, you can assemble a patch quickly. Here is a demo of someone putting together a Bullet Cable in 28 seconds… while talking!
[iframe_loader width=”425″ height=”344″ frameborder=”0″ longdesc=”” marginheight=”0″ marginwidth=”0″ name=” click_words=”” click_url=”” scrolling=”auto” src=”http://www.youtube.com/embed/-RUoZWtbRGI”]

-
12 years ago
seems expensive …?
Reply
Is it a special cable, or can I use the right angle metal pieces with any of my old cables? If so, do they sell the right angles separately … hopefully for a lower price? -
12 years ago
Actually, that’s going rate. Lava Cable Kit is $90, George L Cable Kit is $80. You can also buy individual slug connectors… http://www.bulletcable.com/bullet-cable-shop/slug-connectors/
Reply