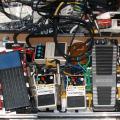
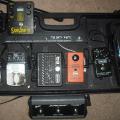
Today’s pedal line is from Joe Valente. If you have a pedal line (doesn’t have to be in a board) for your rig, please email me a photo, bio, description of pedals and routing to pedalline@nulleffectsbay.com. Every Friday I’ll showcase a pedal line submission. Make sure you include any links to your band or music page.
Like a lot of players I know, I went through (and really, I still go through) a lot of pedals in search of THAT tone, and THAT effect. Since I retired my small rack system a few years ago to be smaller, literally dozens of pedals have found a place in front of me, only to be swept aside in favor of something better, smaller, sweeter, or whatever. And whenever that happened, whenever the collection of pedals expanded or shrank, I, being an inveterate tweaker, had to build a new pedalboard to suit.
My first board was constructed of styrofoam glued to coroplast. I punched holes in it, and used zip ties to mount the pedals. The next was similar in construction, but I moved to Velcro like everyone else.
And promptly discovered I hated Velcro.
Next came an ingenious board that incorporated a metal grid and sprung rare-earth magnets to mount pedals to the two-level board. To make things more convenient, the top level is hinged so I can wire and hide all the bits that support the pedals. Later in its life, I got turned on to the Pedal Snake, and I drilled and mounted the Pedal Snake pigtails into the side of the board. Overall, it was pretty brilliant, but it was still too damned big. The case I carried it in doubled as a stand for my amp!
At one point, I was lamenting to a friend that pedalboards ought to be infinitely configurable, and should be fully supportive of the fickle, stick-and-move mentality we guitarists seem to engender.
And so I sat and I thought about it for a while.
I like building things. Then rebuilding. Then changing and tweaking things. I always have, going all the way back to my childhood, when I would spend hours building and rebuilding all kinds of things with my Lego blocks. Why, oh why, can’t pedalboards be more like Lego?
And then it hit me: Why CAN’T pedalboards be more like Lego?
An so, after a couple of trial and error explorations, what you see here is what
my pedalboard has come to.
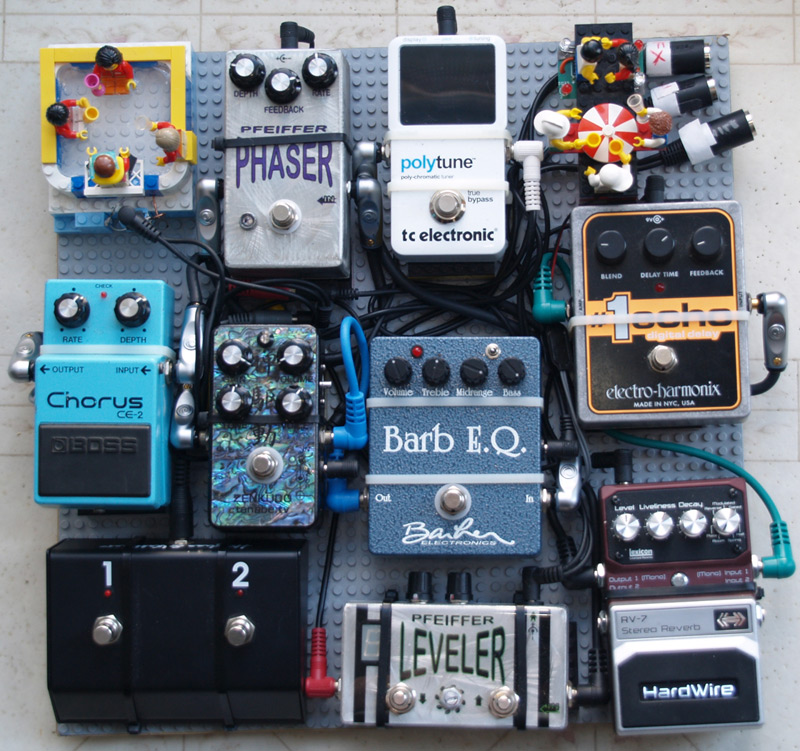
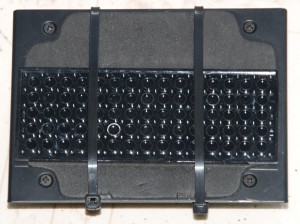
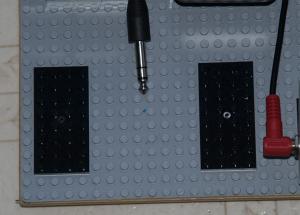
Those that know me know that this is the fourth full iteration of the board, all built on the same base using different pedals and configurations. The pedals have large plates strapped to them using zip ties, and they are mounted on small plates on the base plate (to make room for the zip ties to slip under the pedal).
The Lego gives you the option to raise certain pedals above others, especially as you work from front to back. It also gives you some options when it comes to wiring the board:
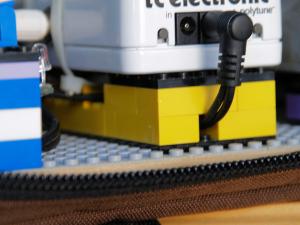
So that’s the system. Hank tells me I should also talk about the pedals, and goodness knows I like to talk about my toys, so I am happy to oblige…
All of my pedals live in the effects loop. That wasn’t always the case, as I had some pedals in front of the amp and others in the loop, but just lately, I’ve come to prefer the sound of guitar-into-amp, using the rest of the effects as, well, effects.
That said, let’s talk about the pedals in order…
* Before you even get to the pedalboard, the chain starts with an Axess Electronics Buffer. I’m about to drive a very long cable run (50 feet, 25 each way) for an effects setup that includes a Boss pedal. So yeah, I need a good buffer. And Axess makes – er, made – one of the best. If you need a buffer, try to find one of these. Moving on..
* First up is the TC Polytune. Who doesn’t need a good tuner, right? This one has the interesting distinction of being able to track all six strings at the same time, so a quick open strum tells you which strings are in tune and which ones need a tweak. I have a love-hate relationship with this pedal, because while it’s cool in concept, but is rather badly executed: If your strings appear in tune in the individual meter mode, they will appear to be flat (or is it sharp?) in multi mode. If you use individual mode with the virtual strobe display, the problem seems to go away. But it still bugs me. These things ain’t cheap, they oughta work as advertised.
* From there, we go to the Pfeiffer Phaser. This is a spectacular pedal as Phasers go, based on the MXR phasers (script AND block), but with a little Pfeiffer magic thrown in. It goes from subtle shimmer to throbbing porn and all points in between. I often use it in place of my chorus, it’s that good. And Dwayne is a great guy too. Speaking of chorus…
* Next up is a Boss CE-2. It’s a freakin’ CE-2, what do I really need to say about it?
* From mod pedals, we move on to the Zenkudo Drive pedal. The guy who makes these pedals now fills them with white epoxy, because (he says) a certain other company (with a slightly Spanish-sounding name) copied his design to create their own popular and similarly-named overdrive. I’ve had both, I like the (purported) original. It has three modes: Dumble (sounds shockingly like a Dumble Overdrive Special), Marshall (sounds kinda like a JCM 900), and Zen (sounds like a bit of Dumble with a bit of fuzz-face). What’s really interesting about the pedal, though, is that in the effects loop in Marshall mode, damned if it doesn’t sound like an AC-15 set on Simmer. Perfect for those Beatles Medleys. And then…
* Barber Barb EQ. I’m not usually a fan of extra EQ, but this one’s a bit different. The tree-way switch gives you access to three different tone stack styles: ’59 Tweed, ’60s Blackface, and and late ’60s Vox. Strangely, it’s the Blackface EQ that gives me the most convincing Beatles jangle, especially in conjunction with the Zenkudo. Next!
* EHX Number 1 Echo. This is far and away the best-sounding digital delay I have ever heard. If you’re looking for organic, soft-edged sounds, look somewhere else; if what you want is a repeat of what you just played, then this is your pedal. My only gripe: the mix knob is way too sensitive, and goes from just about right at about 8:00 on the dial to “Where did my original signal go?” at about 8:30. Then there’s just a completely unusable range from around 8:30-5:00 on the dial. They really gotta fix that..
* So what comes last in the effects loop? Why, reverb, of course! And the Hardwire series of pedals offers up one of the very best ‘verb pedals out there for my money (Hardwire RV-7 Stereo Reverb). Say what you want about Digitech (I’m normally not a huge fan), but this pedal just has “IT.” What’s “IT?” Well, I don’t know, but I DO know that “IT” comes exclusively from Lexicon. Yes, that’s right, the pedal is all licensed Lexicon. Plates, halls, stadiums, whatever. Nothing sounds like a Lexicon. Except this pedal. Suh-weet!
* Finally, the last pedal in line, and one of the most useful, especially if you don’t have a solo boost on your amp or you change guitars from time to time, the Pfeiffer Leveler. This is the pedal that attracted me to Dwayne’s work in the first place, and it’s a completely original design. See the two switches? The right pedal turns you up. The left pedal turns you down. That’s right, it’s a digitally-controlled analog volume pedal! There’s a LED readout that tells you where you are on a scale of 0-7, 4 being unity. I also had Dwayne build in a bunch of his experimental mods, which give me full control over Level 5 and 6 volumes, and control over the overall available gain. It’s great for adjusting to the volume of the rest of the band or for solos, or for stomping all over that other guitarist who just doesn’t know how to turn the heck down once in a while.
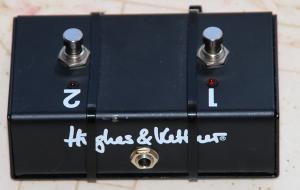
* And of course. There’s the amp switching pedal. I’ve modified my H&K pedal to accept TRS cables rather than the hard-wired crap cable they insist on sticking me with. Does it tick anyone else off that the footpedal for a $1200 amp comes with 49¢ cable permanently mounted to it? I replaced it with a TRS jack. I do that to all my switchable amps.
Anyway, all of the magic – or at least what little magic I can muster – happens through a Pedal Snake that delivers power to the board, signal to and from the board in the effects loop, and switching information from the amp’s pedal.
So, in my quest for the ultimate pedalboard, this is my final answer.
I think.
Maybe.
Joe Valente

